To Configure a Required Task Workflow
Comments Tracking functionality requires a Task template. This section describes how to configure a basic task-based workflow template and assumes a basic working knowledge of AssetWise Director as well as an understanding of task-based workflow and survey concepts. Additional information on this topic can be found in the AssetWise Director Help as well as AssetWise Fundamentals and the AssetWise Implementation Guide which are included in each AssetWise release.
To complete the process described in this section you must first log into AssetWise Director as a user with permissions suitable for creating and configuring Document, Task and Survey classes. It is recommended to log in as the Admin user.
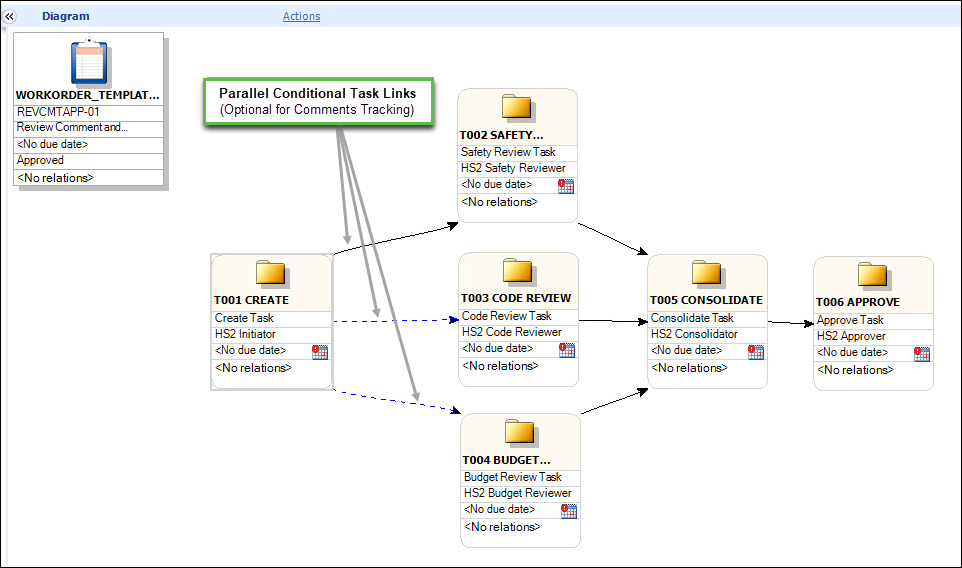
- Review — Used for all tasks that require related documents to be reviewed. This review includes a suggested response.
- Consolidate — Can only be specific for a single task, usually immediately following all Review tasks. The consolidator is able to combine reviewer's comments and then indicate a final decision for the related document(s).
- Approve — Generally used as the last task in the workflow and causes all related Subject Data documents to automatically be approved when the task is completed.

- In AssetWise Director System Administration, expand the Tasks node in the tree.
- Select an existing Child class or create a new Child class.
- Confirm that the Task class type is Survey.
- From the Templates topic, click New.
- Enter the Name, Description, and Mask for the template.
- From the File menu, select Add.
- From the Diagram window, click Actions, and then select Add Task to create a task for the workflow.
- Repeat Step 7 for each task that you want to add.
-
When all tasks are added, click
Actions and then select
Link, to establish the relationships between
the tasks.
For example,
Each task must have at least a Skill assigned to it. (Assigning a Person is optional.) You can assign a skill or person by right-clicking on the task and selecting Properties. For example,
The Task can also have both a Skill Area and a Person, please refer to the AssetWise documentation for more information about Task properties. The Duration should also be specified.
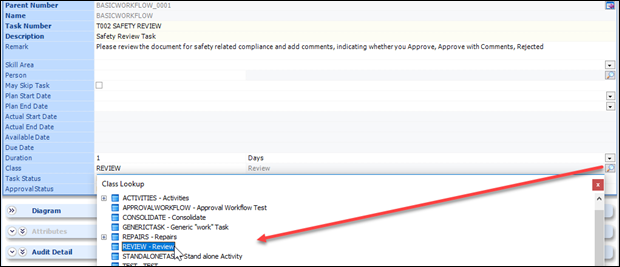
- Right-click the Task and select Go to Task. Once on the task, select Show All to reveal the Class. field. Select the Search icon and then pick the applicable Task Class: For example,
- Approve the task (workflow) template.